This article explains the features of the Code Editor page and how to use them effectively. Using the Code Editor, you can:
- Load raw data.
- Write transformation code.
- Materialize or test datasets.
- Check dataset quality.
- Execute SQL queries and view dataset data.
Additionally, the Code Editor includes AI-powered tools to assist you in finding data and writing transformation code.
Raw Zone
The Raw Zone is where you load data from your local machine. To work with files, you must create a dataset first. Files cannot be processed without a dataset.
Creating a Dataset
- Click the Add Dataset button.
- Fill in the required fields:
- Path: Specify the storage location.
- Name: Provide a unique dataset name.
- Format: Choose the dataset format.
- (Optional) Description: Add a brief description of the dataset.
- (Optional) Header: If set to true, the parsed data will use column names from the uploaded file.
- Once all fields are complete, click Create.
- Your dataset will appear in the Navigation Tree after a few moments.

Uploading Files to a Dataset
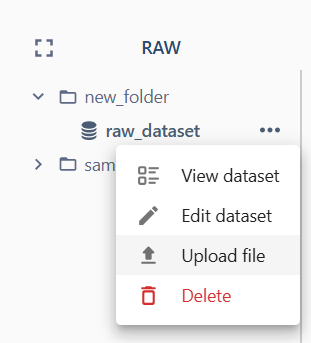
- Select your dataset in the Navigation Tree.
- Open the Menu and choose Upload File.
- Select files from your local machine.
- Click the Upload button.
Your files will now be stored in the selected dataset.
Clean Zone
You can manage your datasets in the Clean Zone and prepare them for further transformations.
Creating a Dataset
- Click the Create Dataset (+) button.
- Complete the form fields as described above.
- Click Create.
- The new empty dataset will appear in the Navigation Tree.

Transform Zone
The Transform Zone provides tools for editing, transforming, and materializing datasets.
Edit Dataset
To edit a dataset:
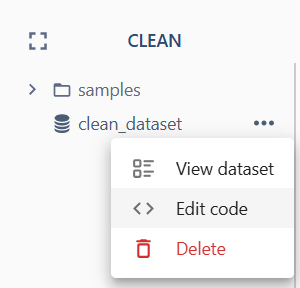
- Select a dataset in the Navigation Tree.
- Open the Menu and select Edit Code (or Edit dataset for the raw zone).
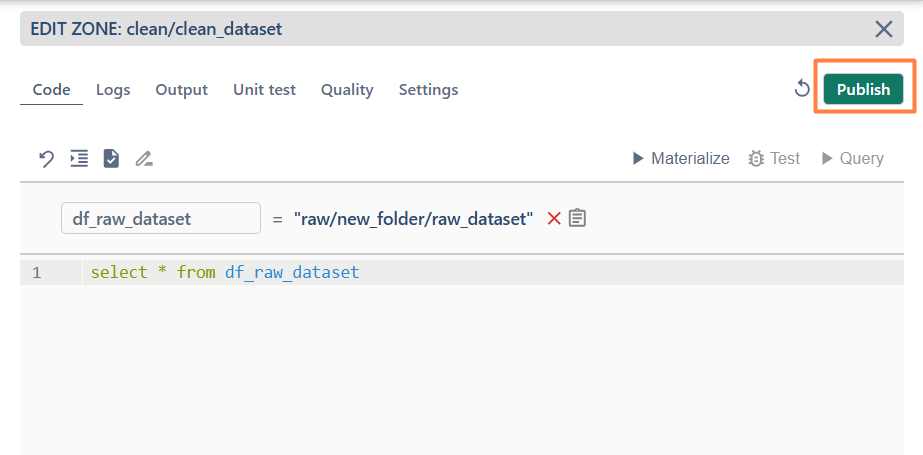
- Make the necessary changes in the editor.
- Click Publish to save your changes.
- To exit the edit mode, click X in the top-right corner.
View Dataset
To view a dataset:
- Select a dataset in the Navigation Tree.
- Open the Menu and select View Dataset.
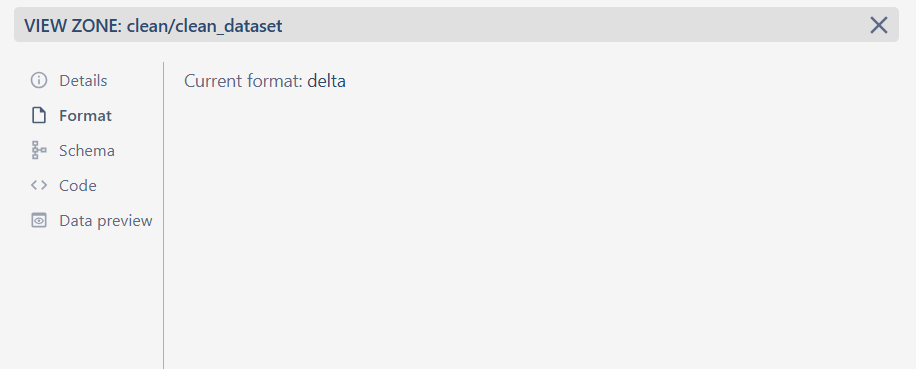
- In the View Zone, explore the following tabs:
- Details: Displays the dataset description and the timestamp of the last successful materialization.
- Format: Provides information about the dataset's file format.
- Schema: Contains details about the dataset's schema.
- Code: Shows the transformation code associated with the dataset.
- Data Preview: Displays the dataset’s data (default view shows the top 10 rows, but you can modify the query).
- To exit the view mode, click X in the top-right corner.
SQL Transformations
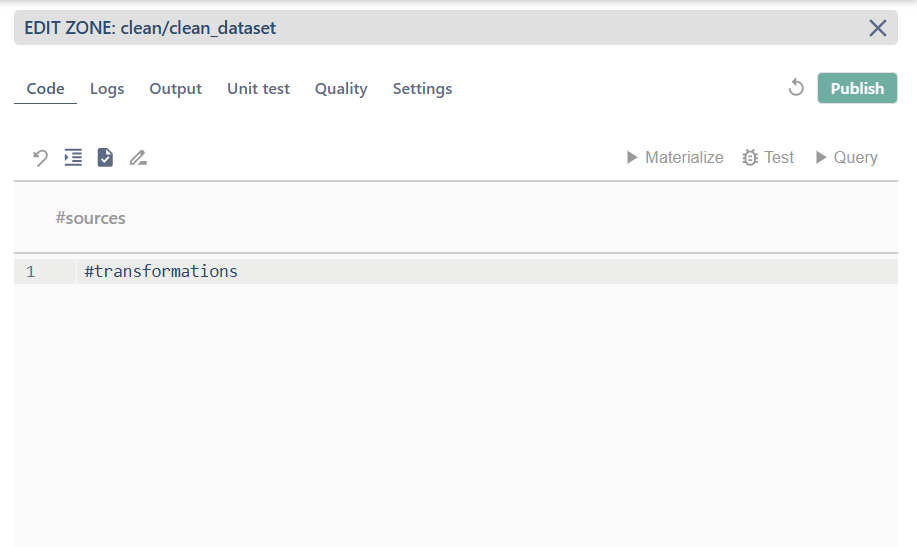
The SQL Transformations section (opened as a default) is divided into two parts: Sources and Transformations.
- Adding Sources: Drag and drop a dataset (or file) from the Navigation Tree into the Sources section.
- Editing SQL Code:
- Use the Format Code button to organize your code neatly.
- Use the Validate SQL Query button to check for errors.
- Running Queries:
- Click Query to execute the SQL query without running a job. Results will appear in the Output tub.
- Saving or Discarding Changes:
- Click Discard to cancel changes.
- Сlick Publish to save the changes.
PySpark Transformations
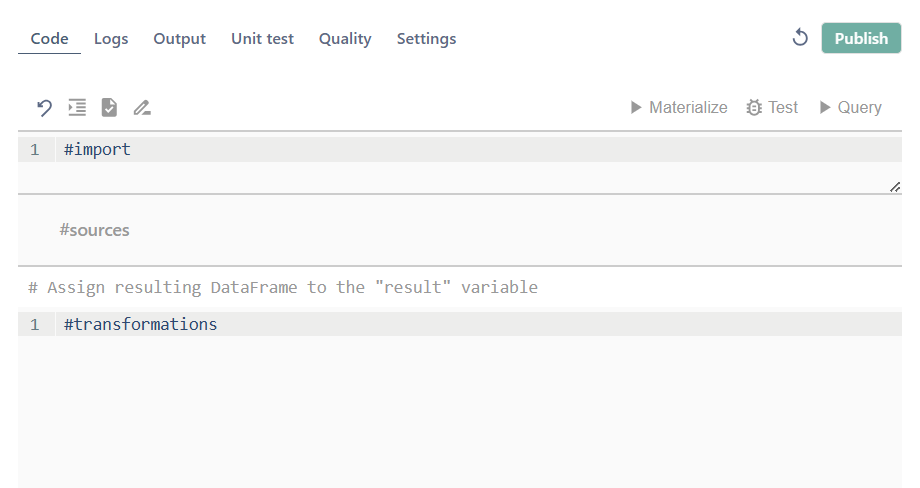
The PySpark Transformations section includes three components: Imports, Sources, and Transformations.
To change the language to PySpark navigate to the Settings tab.
- Adding Sources: Drag and drop a dataset (or file) from the Navigation Tree into the Sources section.
- Writing Transformation Code:
- Ensure the code in the Transformations section is assigned to the
resultvariable (mandatory)
- Ensure the code in the Transformations section is assigned to the
- Saving or Discarding Changes:
- Click Discard to cancel changes.
- Сlick Publish to save the changes.
Run Materialization
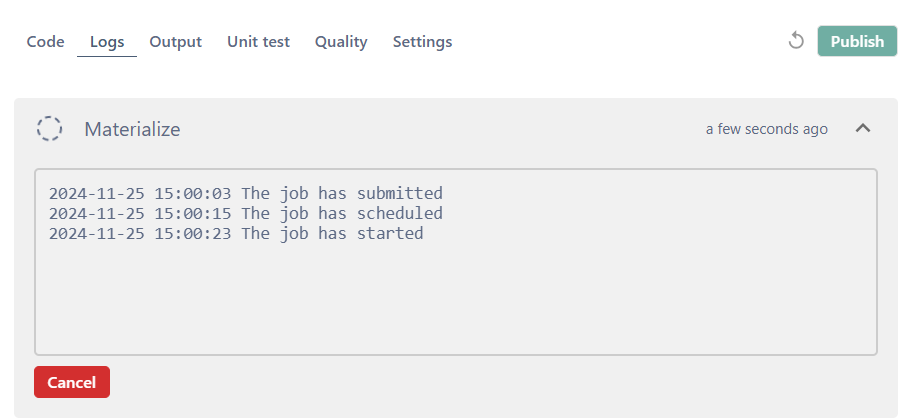
To materialize data:
- Click the Materialize button.
- The Logs tab will display real-time updates.
- To cancel the job, click Cancel.
- After completion, view full logs by clicking the link in the Logs section.
Unit Tests
Use the Unit Tests feature to test your transformation code on sample data.
Adding Test Samples
- Navigate to the Unit Test tab.
- Select a source.
- Click the Upload New Samples button.
- In the pop-up window, upload a
.csvfile with a comma delimiter from your computer. - Click Upload.
- The active sample will appear in blue/green (depending on the theme).
- Other samples will appear in grey.
Running a Test
- Ensure test samples are selected for all sources and the target.
- Click the Test button.
- The test will run on the selected samples.
- Results will be stored in a separate table and will not overwrite the dataset's values.
Quality Checks
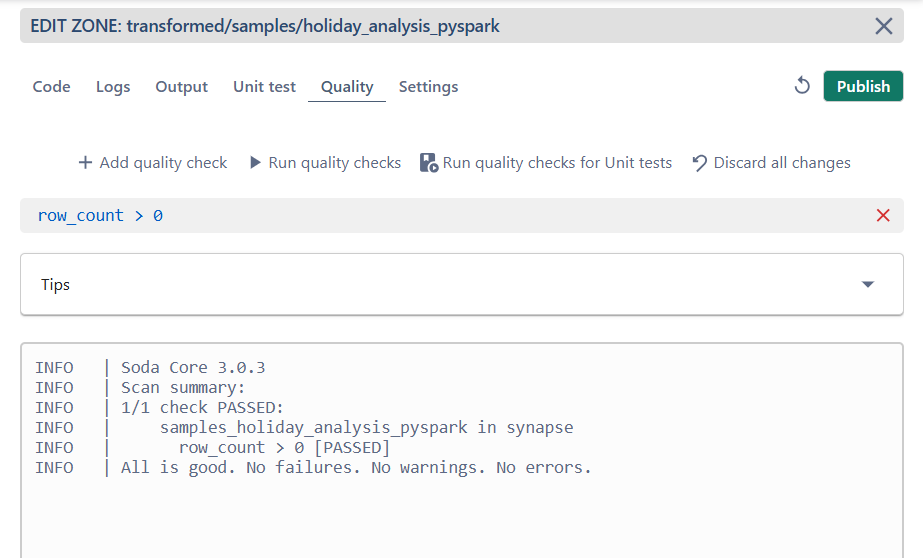
To verify the results of materialized or tested data, use the Quality Checks feature powered by Soda Core.
- Navigate to the Quality tab.
- Click Add Quality Check to define a new rule, or X to remove an existing one.
- To discard all changes, click the Discard button.
Adding Rules
- Rules must follow the Soda Core syntax. Refer to the Tips section for guidance.
Running Quality Checks
- Click Run Quality Checks to verify materialized datasets, or Run Quality Checks for Unit Test for test data.
- Results will appear in the Logs section of the same tab.
AI Code Generation
Leverage AI to quickly generate transformation code or modify existing code.
Requirements
To use AI Code Generation:
- Configure an OpenAI access token on the Infrastructure page.
- Ensure at least one source is configured.
- Upload and select test samples for all sources and the target.
Generating Transformation Code
- Click the Generate icon.
- (Optional) Add a comment specifying any particular commands or actions.
- Click the Generate button.
- The generated code will appear below the existing code in the Transformations Code zone.
Query
Query a source dataset from the Clean Zone or Transformed Zone (SQL mode only).
- Write an SQL query in the editor.
- Click the Query button.
- Output data will appear in the Output tab.

AI Data Explorer
We have implemented AI to help you quickly locate data and automate dataset creation. (Refer to the documentation for details.)
Lineage View
Prerequisite: A PostgreSQL Cluster must be running.
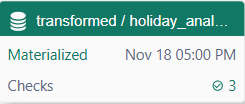
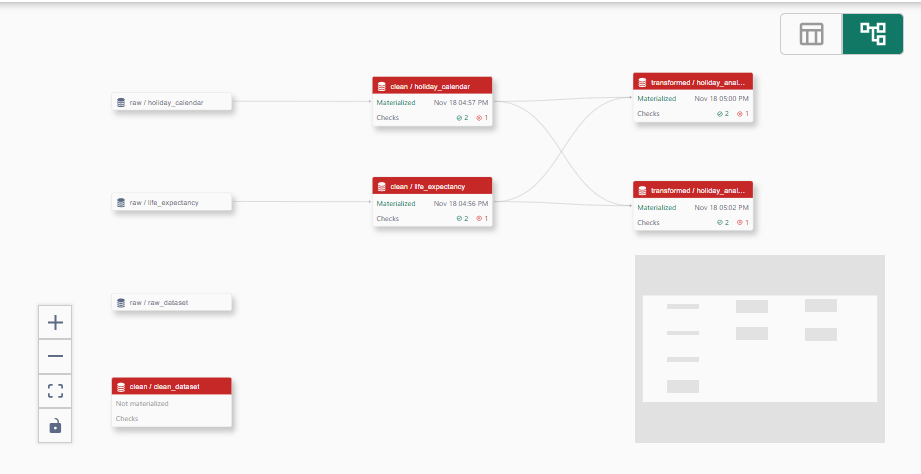
The Lineage View displays all datasets along with their dependencies, statuses, and check results.
Dataset State
Each node in the DAG Schema contains the following information:
- Dataset Path: Displays the storage path of the dataset.
- Materialization Status: Indicates whether the dataset is materialized.
- If materialized, but the text is red, it signals an issue post-materialization. Hover over the "?" icon for details.
- Dataset Checks Statuses: Displays the results of three checks:
- Materialization
- Quality Check
- Unit Test
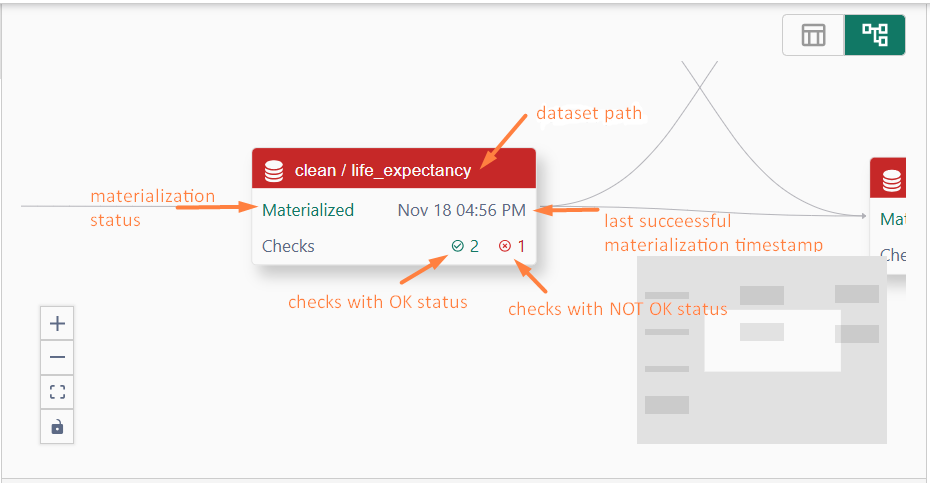
A green header with the dataset path indicates all checks are in an OK status.
