Choose cloud provider
On the left panel you can choose preferable provider (at the moment only Microsoft Azure is supported)
- Microsoft Azure
- Amazon Web Services (not supported yet)
- Google Cloud Platform (not supported yet)
Configure your cloud account (Azure)
Client prerequisites
- Register IBA Lakehouse app in your Azure subscription
First, you need to register our app in your account by creating a service principal for it. You can do it via Cloud Shell. To be able to do so, your AD user must have one of the following roles:
- Global Administrator
- Application Administrator
- Cloud Application Administrator
Log into Cloud Shell and select PowerShell type of terminal. Agree to mount a new storage if it is the first terminal usage.
Execute the following command to connect to Azure AD:
PS /home/user> Connect-AzureAD
Now, you can create a service principal and assign it to the FastLake application:
PS /home/user> $spInOneTenant = New-AzADServicePrincipal -AppId f373d29b-923c-4662-beca-267c1af809d6
Here AppId = 'f373d29b-923c-4662-beca-267c1af809d6' is a static FastLake Portal's application ID. In case it changes in future please reference portal.ibalakehouse.com for the most recent value.
Print Service Principal Details
PS /home/user> $spInOneTenant DisplayName Id AppId ----------- -- ----- IBA Lakehouse c1ee098b-86ff -476a-a7c4-ff935876c76b f373d29b -923c -4662-beca -267c1af809d6
Use DisplayName to find the service principle in Azure Portal in downstream steps.
- Assign permissions
- Select the subscription you would like to create a FastLake project in
- Go to IAM
- Create a role with permissions listed in datalakeadmin_role_definition.json.
- Create a role assignment by selecting the role you've created during previous step to the service principle assigned to the FastLake app.
- Prepare DevOps organization
- Create DevOps organization if you don't have one. You can do it here: https://dev.azure.com
- Add the service principle you've created for the FastLake app to the organization's users.
- Add the user you've created in the previous step to the Project Collection Administrators group.
- Provide subscription id, tenant id and DevOps ogranization name while registering a new account in the FastLake portal.
Additional considerations
Synapse Analytics has a default quota of 12 vCores per workspace. It can be increased by submitting a support ticket from the Workspace -> Help in Azure Portal. In order to be able to submit support tickets, you need to have at least a Developer support plan.
After project creation, users will need certain permissions if they want to work with Lakehouse directly in Azure:
- Synapse Workspace: admin privilege directly from the Synapse Studio -> Access Control
- Storage Account: blob Contributor - in order to be able to query Synapse LakeDB
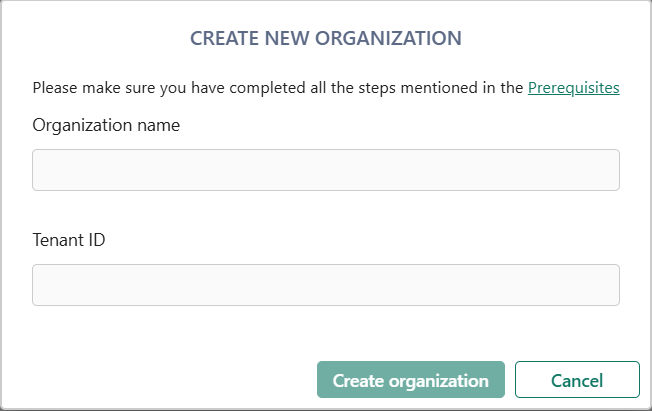
Add organization (Azure)
To add new organization, press the + button under the Organizations tab and fill in the form

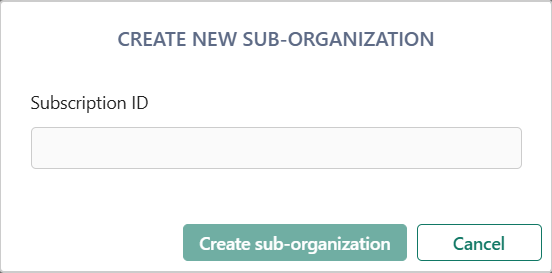
Add sub-organization (Azure)
To add new sub-organization, press the + button under the Sub-organizations tab and fill in the form with subscription ID

Create a new project (Azure)
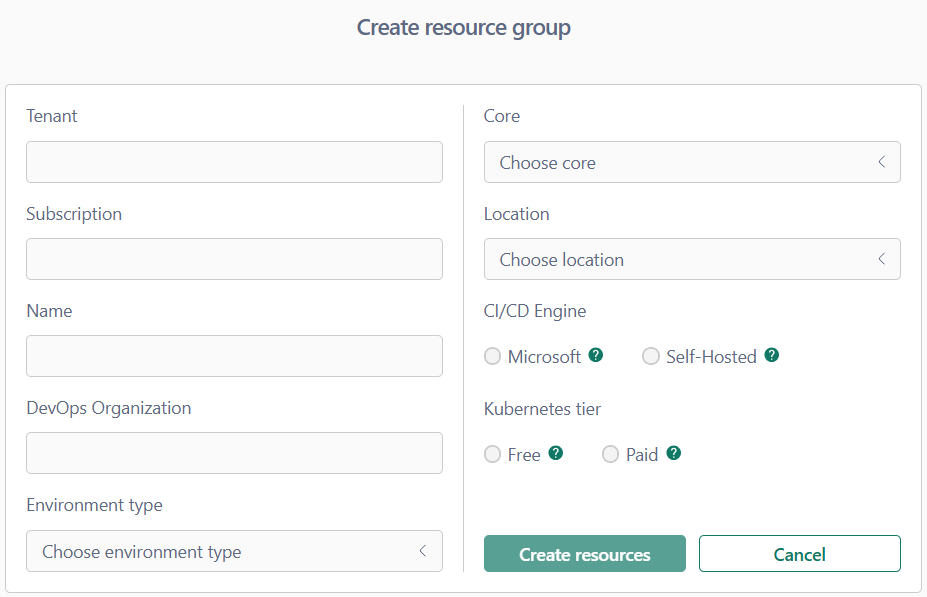
To add new project, press the button Add project+ under the Projects tab and fill in the form
- Tenant: auto filled with the tenant's name
- Subscription: auto filled with the subscription's name
- Name: specify a unique name for the resource group.
- DevOps Organization: enter the name of your DevOps organization.
- Environment type: select the environment type from the dropdown
- Single (Dev only)
- Multi (Dev and Prod) (not yet supported)
- Choose core: choose the core setup from the dropdown menu
- Synapse analytics
- Databricks (not yet supported)
- Snowflake (not yet supported)
- MotherDuck (not yet supported)
- Choose location: select the geographical region where the resource group will be hosted. Ensure it aligns with your compliance and performance needs.
- CI/CD Engine:
- Microsoft (you need to request a free parallelism grant on Microsoft side: https://aka.ms/azpipelines-parallelism-request)
- Self-Hosted (requires additional cost for Virtual Machine set up)
- Kubernetes tier:
- Free (Recommended for clusters with fewer than 10 nodes but can support up to 1,000 nodes. Resource creation is not guaranteed in "Free" tier and depends on Azure resources availability)
- Paid (Can support up to 5,000 nodes in a cluster. Greater cluster reliability and resources. Uptime SLA is enabled by default)

* The process of resource creation may take 30–60 minutes, depending on the selected configuration.

